During my undergraduate studies in Computer Engineering at UC Santa Cruz (UCSC), I worked on a wide array of hands-on mechatronics, embedded systems, digital design, and robotics engineering projects. This archive consolidates project demonstrations, technical b-roll footage, and prototype testing videos captured during these foundational years.
CMPE 100: Digital Logic Design
- Focus: Fundamental combinational and sequential logic design, gate-level implementations, and hardware verification.
- Highlights: Designed and tested robust digital subsystems, finite state machines, and hardware description language workflows on FPGA development boards.
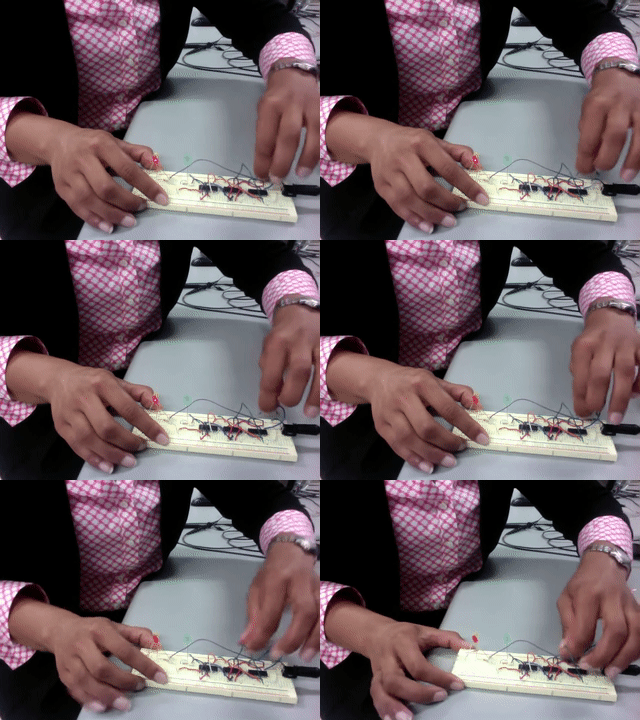
Breadboard D Flip-Flop Circuit & Hardware Testing
Timeline: Fall 2010 | Role: Digital Logic Designer | Tech Stack: Breadboard TTL Logic, D Flip-Flops, Oscilloscope, Logic Analyzer
CMPE 121: Microprocessor System Design
- Focus: Microprocessor architecture, memory mapping, peripheral interfacing, and low-level C and Assembly programming.
- Highlights: Engineered a fully integrated microcontroller-based system, managing custom peripheral drivers, interrupt service routines, and serial communication protocols.
68HC11 Microcontroller Board for Mechanical Gripper Control
Timeline: Spring 2011 | Role: Embedded Systems & Hardware Engineer | Tech Stack: Motorola 68HC11, C / Assembly, RS-232 UART, SRAM / EPROM Bus Interfacing, Soldering & Wire-Wrap
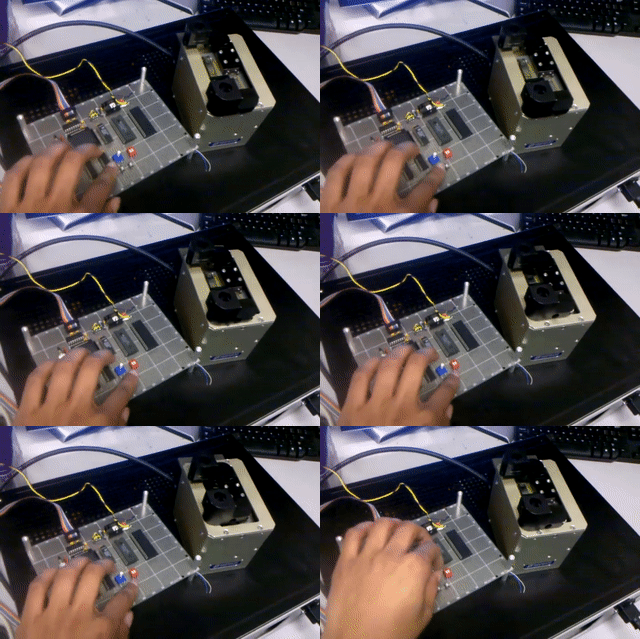
For CMPE-121 Microprocessor System Design at UC Santa Cruz, we designed, hand-soldered, and programmed a custom embedded computer board based on the Motorola 68HC11E1 microcontroller, bringing bare silicon up to full operational capability to control a mechanical gripper without a host computer.
Hardware Interfacing & Firmware Engineering
Building the single-board computer required precise hardware timing analysis, manual bus wiring (wire-wrapping and soldering), address decoding, and low-level C/Assembly firmware engineering:
- Memory Subsystem Interfacing: Designed and wired 8KB external SRAM and 8KB EPROM memory ICs with 74HC logic gates for precise address decoding.
- Serial & Peripheral Communication: Configured RS-232 serial UART communication for terminal debugging alongside SPI interface logic for peripheral expansion.
- Power Regulation & Hardware Diagnostics: Designed onboard 5V linear power regulation circuitry and integrated LED logic displays for verifying memory read/write cycles.
Software & Gripper Control Implementation
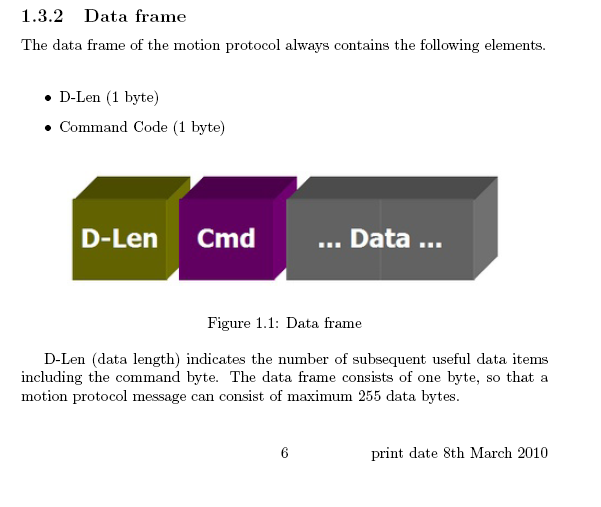
We structured the software to manage real-time communication and hardware feedback loops using the RS-232 communication protocol:
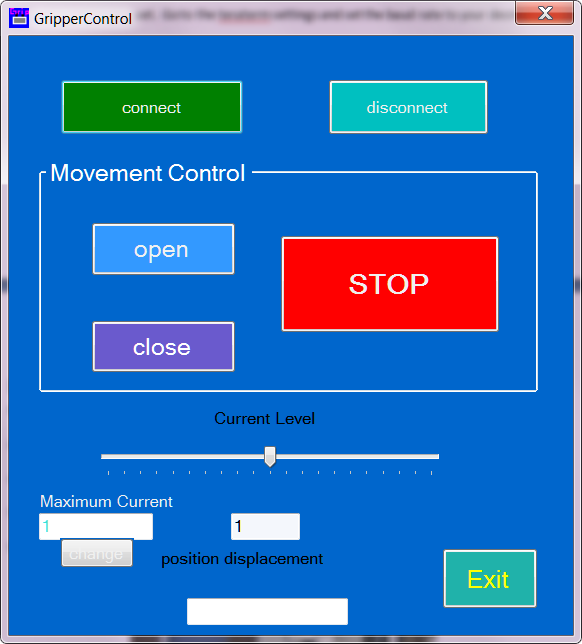
- Pseudo-Force Control: Motor resistance is regulated by specifying direct current levels. We mapped out eight distinct current settings into their hexadecimal representations, creating a structured command look-up table for both opening and closing actions.
- Dynamic Lookup System: When an operator presses a digital push-button, the program measures the active voltage across the potentiometer and uses that value to index the corresponding open or close command from the lookup table.
Engineering Impact & Verification
- Timing & Bus Validation: Verified signal setup and hold times across system buses, preventing bus contention during high-speed memory reads.
- Prototyping Platform: Created a reliable embedded hardware platform for real-time sensor data collection and low-level firmware testing.
Technical Report Download
CMPE 118: Introduction to Mechatronics
- Focus: Interdisciplinary electromechanical systems blending microcontrollers, analog signal conditioning, DC/stepper motor control, and sensor feedback loops.
- Highlights: Built autonomous embedded robotic platforms capable of real-time environmental navigation, obstacle detection, and precise actuation under tight hardware constraints.
MAK Attack Autonomous Mechatronic System
Timeline: Winter 2012 | Role: Systems Engineer, Programming Lead & Circuit Debugger | Tech Stack: PIC32 Microcontroller, C, Hierarchical State Machines, IR Sensors, Op-Amp Filters, PWM Motor Control, SolidWorks
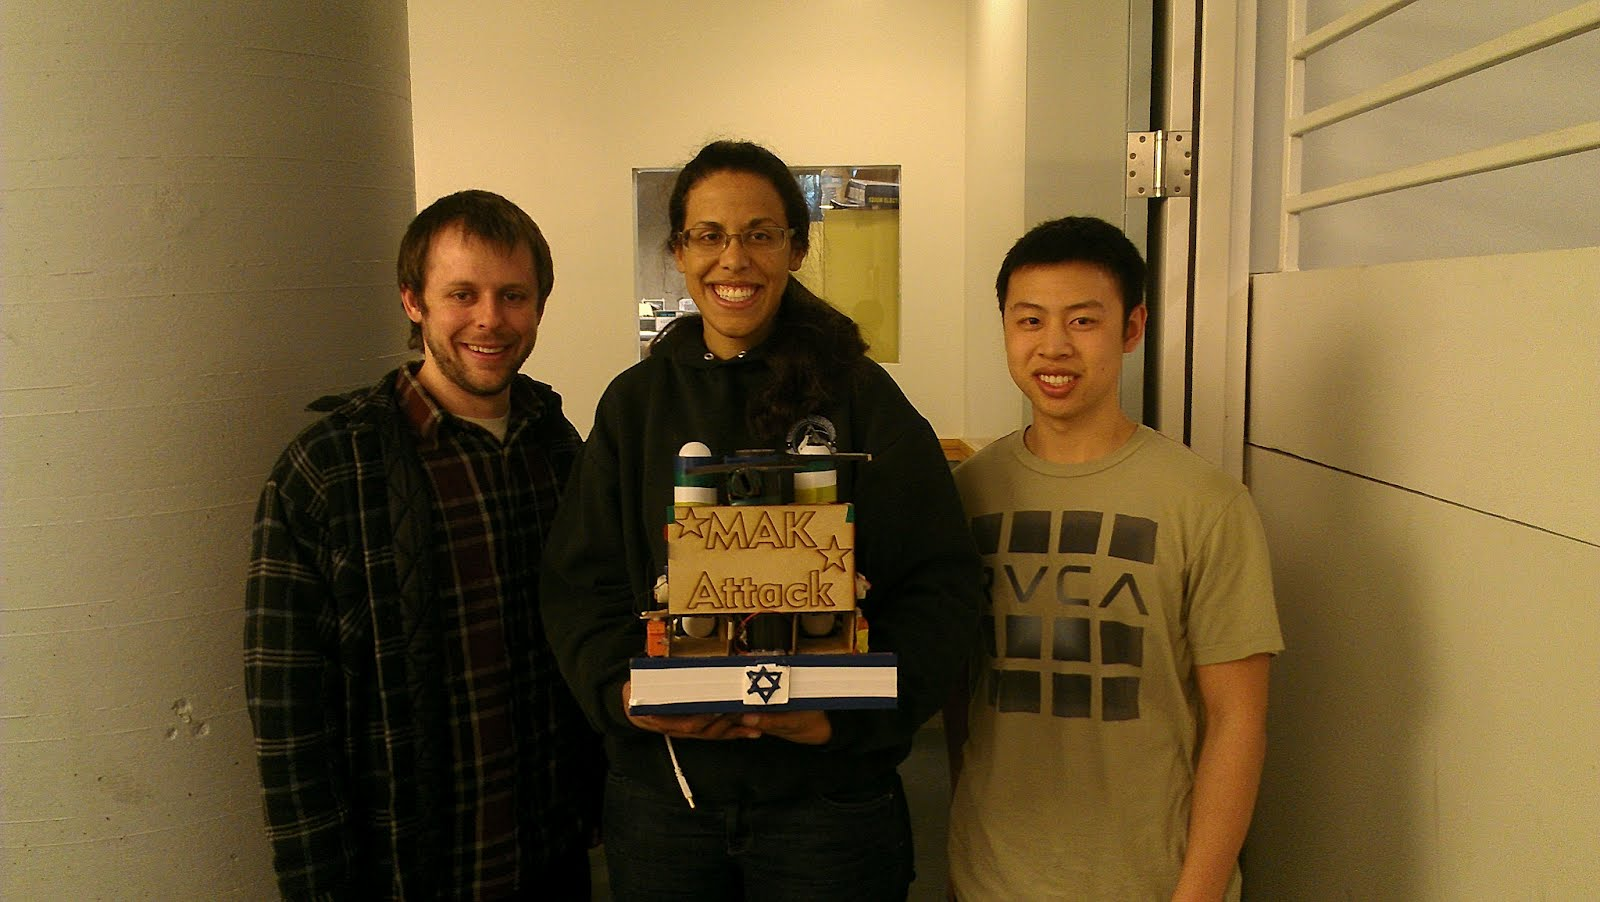
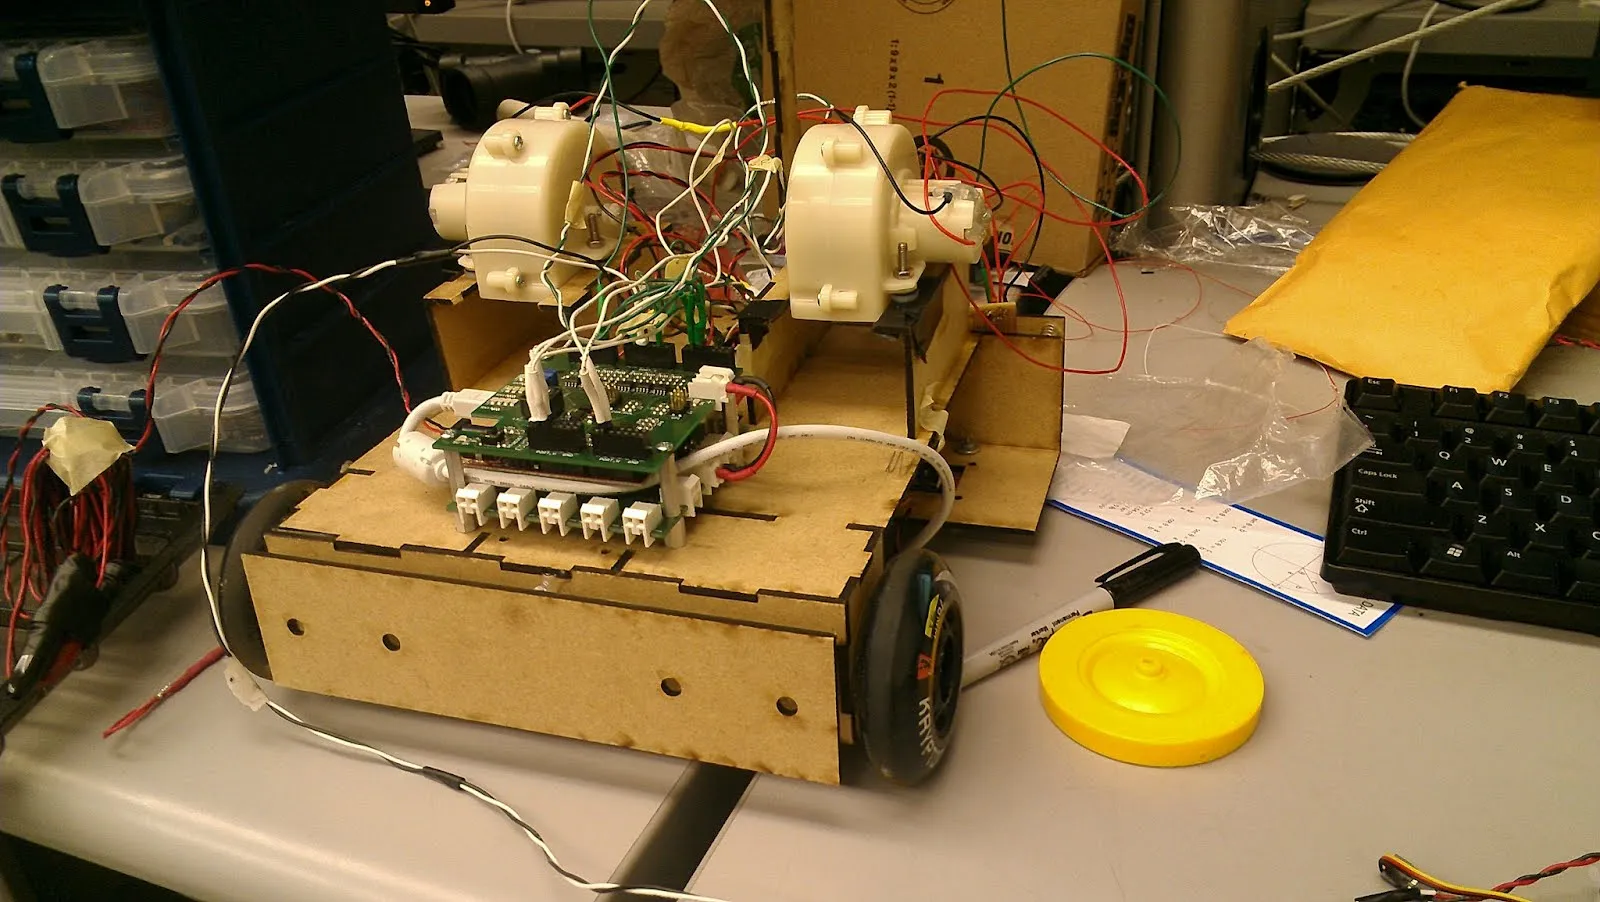
In CMPE-118 Introduction to Mechatronics at UC Santa Cruz, my team (Matthew Luxton, Kyle Huey, and I) designed, constructed, and programmed MAK Attack—an autonomous mobile robot built to solve real-time arena navigation and object manipulation challenges under strict operational deadlines.
Project Overview & Core Requirements
Designed and engineered an 11" x 11" x 11" fully autonomous robot programmed to navigate an 8' x 8' competitive course, locate and engage an opponent island via infrared beacons, deploy a mechanical projectile system, and return safely to the home island.
Engineering Design & Implementation
1. Software Architecture & Control Systems
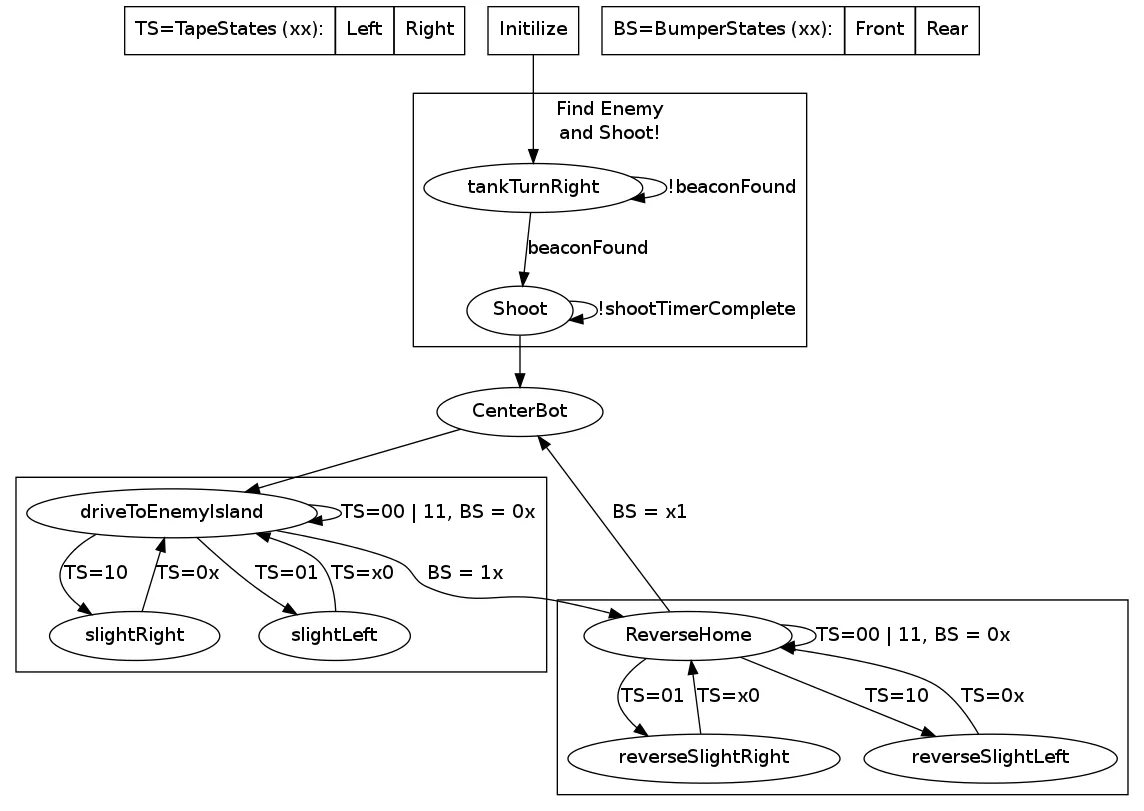
- Hierarchical Finite State Machine (FSM): Architected and programmed a complex control structure featuring modular sub-state machines (e.g., dedicated centering algorithms and localized sensor-sampling logic).
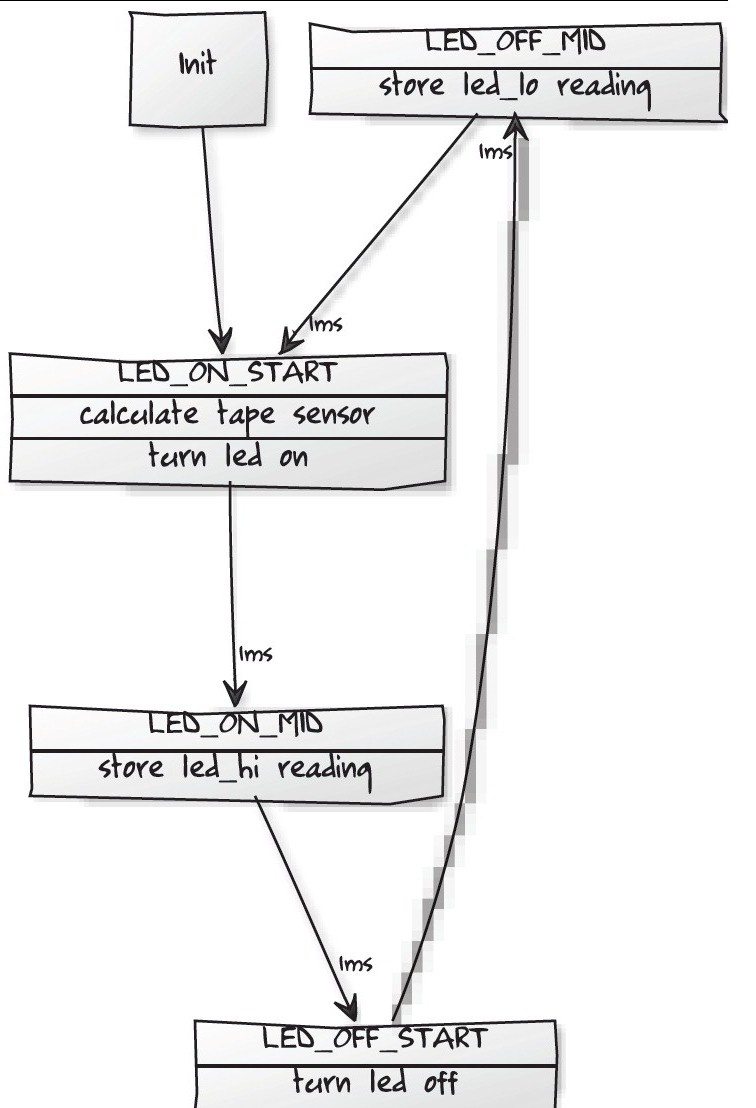
- Ambient-Resilient Event Detection: Developed a differential sampling state machine for the robot’s IR tape sensors. By capturing active and passive states sequentially, the software calculated ambient light deltas to stabilize detection thresholds under variable environmental lighting.
- Adaptive Battery Voltage Scaling: Engineered an algorithmic solution to address supply fluctuations (from a 14.4V dual-battery series configuration). Built continuous PWM duty-cycle scaling code utilizing a 10-bit ADC reference to normalize motor outputs relative to a steady 12V operational baseline, ensuring consistent maneuverability and projectile power.
2. Hardware & Electrical Engineering
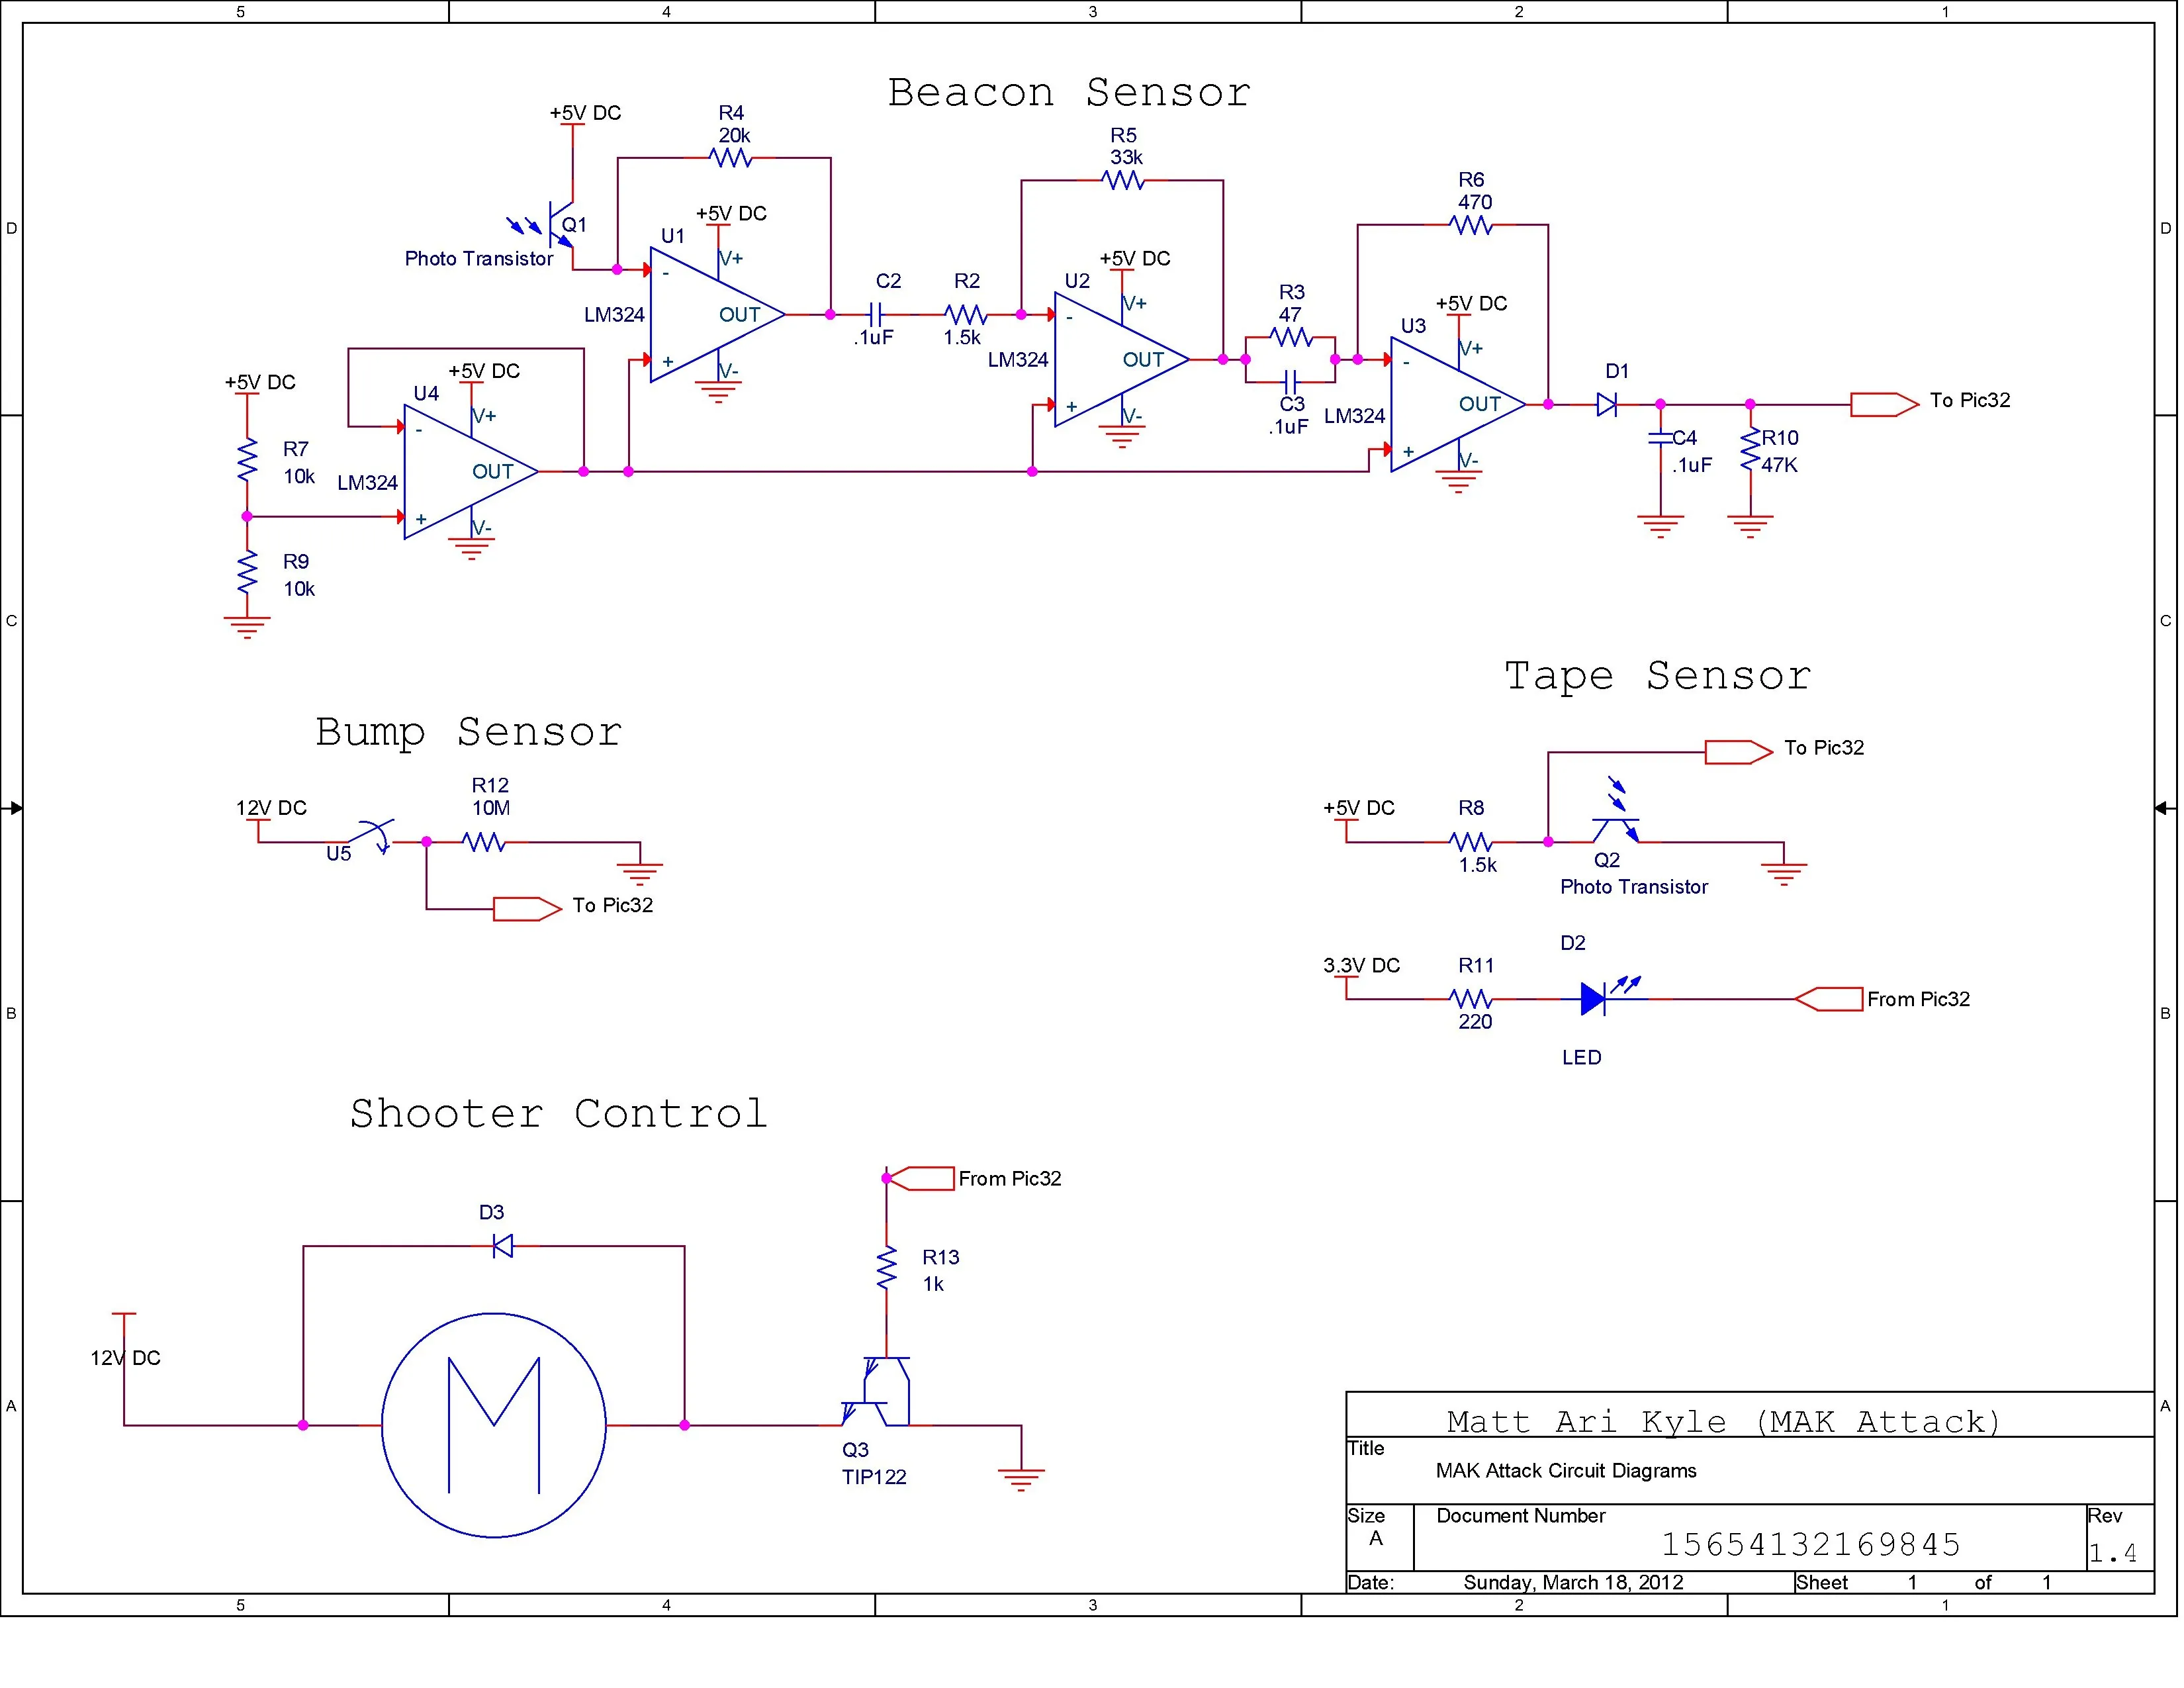
- Mixed-Signal Circuit Debugging: Led the integration, isolation, and validation of the robot's sensory circuits, including high-pass and low-pass trans-resistive op-amp filter stages to clean noisy phototransistor signals.
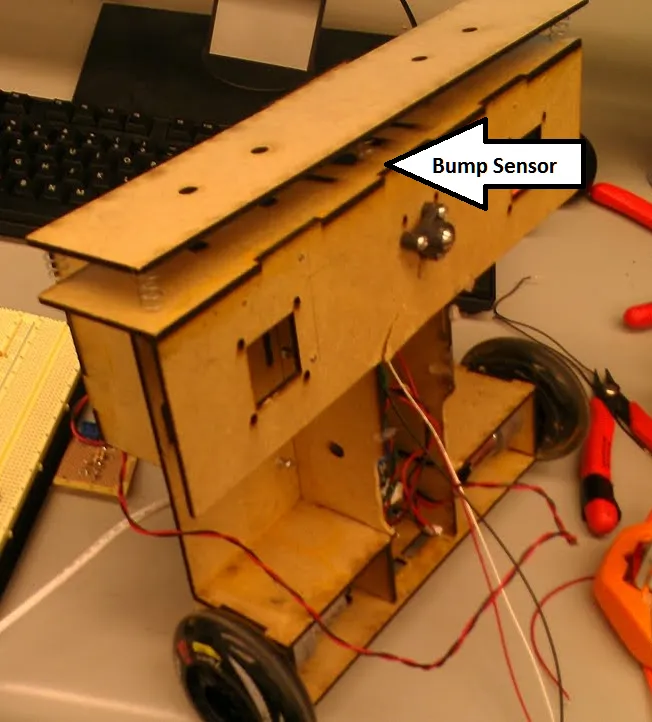
- Sensor & Actuator Integration: Successfully implemented an active-high IR beacon-tracking filter, basic binary bump-sensor networks, a high-current H-bridge driver circuit, and dedicated TIP122 Darlington transistor circuits to govern mechanical subsystems.
3. Mechanical Design Strategy
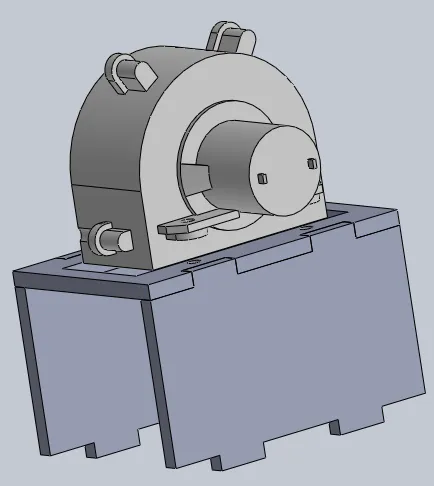
- Modular Parametric Chassis: Participated in the collaborative design of a modular CAD framework in SolidWorks. The architecture isolated structural power distribution and drive elements from specialized operational modules, simplifying physical debugging and enabling efficient on-the-fly hardware replacement.
- Servo-Driven Launching Mechanism: Integrated dual high-velocity toy motors paired with a high-torque servo-actuated feeding mechanism to sequentially chamber and discharge ping-pong projectiles at target vectors.
Key Results & Engineering Takeaways
- Integration-Driven Development: Successfully mitigated integration bottlenecks by designing testing harnesses and sub-assembly code in parallel with mechanical builds throughout a 5-week integration runway.
- High-Precision Target Acquisition: Achieved exceptional accuracy with the projectile launcher, consistently landing multiple impacts on target by relying on dynamic software thresholding to counter complex external ambient light interference.
- Agile Problem Solving: Overcame a critical, late-stage failure of the robot's primary micro-servos by adapting the physical chassis to house robust, larger-scale servos and utilizing custom ground shielding around signaling lines to eliminate high-current motor noise.
Downloads
System & Component Gallery
Standalone Embedded Hardware Projects
- Focus: Interactive embedded hardware, custom firmware state machines, and resource-constrained peripheral control.
- Highlights: Developed portable arcade-style embedded hardware projects powered by standalone microcontrollers, featuring custom multiplexed matrix displays, debounced user inputs, and responsive gameplay logic.
Microcontroller-Based LED Ring Reaction Game for UCSC Engineering Week
Timeline: February 2012 | Role: Embedded Hardware Developer (Team with Nathan Abercrombie & Julian Dahan) | Tech Stack: Microcontroller, C, LED Output Multiplexing, Analog Input Sensing, Serial Communications
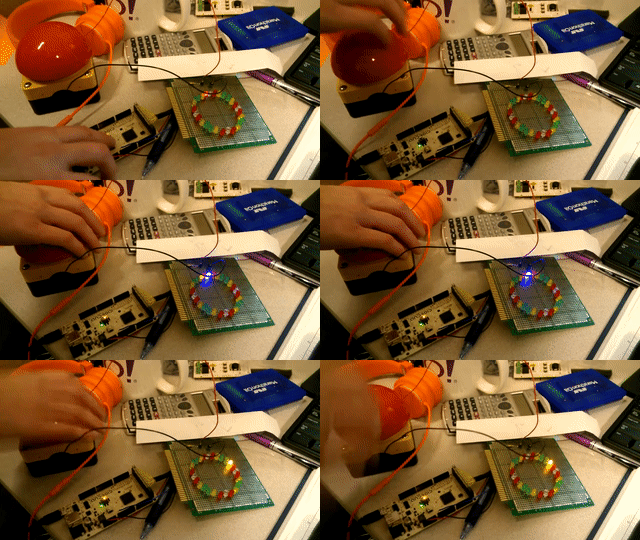
We created this interactive arcade game for the Tau Beta Pi student organization during Engineering Week at UC Santa Cruz in February 2012. Built by Ariel Anders, Nathan Abercrombie, and Julian Dahan, the game challenges players to press a large button and stop a fast-moving light on a specific target LED.
We wired an array of 28 individual LEDs across digital output pins 22 through 49. The code lights up one LED at a time with a quick 10ms delay, making the light look like it is spinning in a continuous circle. The game button connects to an analog input pin (A0). The microcontroller constantly reads this pin, and when the button press drops the reading below our set threshold of 500, the movement loop stops completely. This freezes the light, sends the final score data through a 9600 baud Serial pipeline, and keeps the game at the end screen until you press reset to play again.
Technical Summary & Core Takeaways
These undergraduate endeavors established my core engineering methodology across:
- Embedded C & Microcontrollers: Low-level register configuration, interrupt-driven I/O, and serial protocols.
- Mechatronics Integration: Interfacing analog sensors, shaft encoders, DC motors, and stepper drivers.
- Real-Time Control: PID feedback loops, finite state machine architectures, and hardware-in-the-loop debugging.